| Chapter 2. Introduction | ||
|---|---|---|
   | ||
| Chapter 2. Introduction | ||
|---|---|---|
| ||
It's time to begin
Although the title of this document is XOOPS Installation Guide, the truth is that for the moment the document is just a look at how the XOOPS Installation Wizard takes your through the steps necessary to first install your XOOPS site. This means in particular a couple of things:
For the moment it doesn't address the needs of people upgrading their XOOPS installation.
It assumes you already have a working environment, that is either LAMP or WAMP.
To compensate for this, I promise this is not your average sequential installation document. Rather, it attempts to guide you through the installation while at the same time giving you some useful pointers about how XOOPS works. So, you'll probably will be able to install your XOOPS site and certainly will end up knowing more than if you just fill in the blanks and click on the Next buttons.
So, if these points haven't changed your mind, that is, if you're still firm on your decision of going ahead no matter what, well, you've been warned.
Still here? Well, that means you want to install a XOOPS site, this is a first installation and you already have a working environment. That is, you already have a place to run together the web server Apache, the database manager MySQL and the scripting language PHP, either on a Linux or a Windows platform, either on your local machine or on a hosted remote server. You have all this and you also have an archive downloaded from the XOOPS site.
As of this writing, the XOOPS version of choice is 2.0.6, and you have two download options. You got the archive as a TAR file (1,013 kb, quite better compression) or as ZIP file (1,602 kb), so the first thing to do is to uncompress the archive in some local directory. What will you get?
You get a directory called xoops-2.0.6 that has three subdirectories:
docs, a place where you can read the change log, the GNU/GPL license, a credits file and a HTML install document.
extras, where you have an option to display your login form in a pop up, as well as another version of the x2t theme. Why this second version? Because here it includes the whole template set, not just the theme files. It even includes a few extra goodies, such as a template to display your news in a two column format;
html, which contains all the code of your XOOPS site.
So, in order to begin your installation, you have to copy the contents of the full html directory to the root directory of your environment. What was that again? You need to copy the contents of the full html directory to the root directory of your environment. Oh, you'd rather have a little explanation about this. Well, here it goes.
If you're installing this to a local machine, this means copying the directory to the directory where your web server will look for files. For instance, my testing environment is a package I got from the Apache friends, called WAMPP1. In many of these packages, the web root is a directory called htdocs, so the first step is to copy the entire html folder so that it sits inside htdocs. Ready? Now change its name to xoops. This means that, when you run things locally, you'll have to type http://localhost/xoops" to access your XOOPS site.
Now, if you're installing your site in a hosted remote server, you'll have to upload the html directory to one of the directories you have access to. In this case, you'll probably have a public_html folder, and that's where you'll need to upload the complete html directory. Again, after uploading everything (probably with an FTP client software), change the name of this folder to xoops. Since you'll be installing in your root folder, in this case you'll access your site typing in your browser http://www.yoursite.com.
Are we ok so far? Well, we're ready now to begin the installation of the XOOPS software. To do it, point your browser to the directory you just made, that is, type http://localhost/xoops if you're in your local machine, or http://www.yoursite.com if you installed in a hosted remote server. If everything went well, this will awaken the XOOPS genie, and the system will run the file index.php. In doing so, the first thing it'll do is to include the file mainfile.php, which is the file in charge of holding a lot of system parameters. But for the moment, the file contains a reference to another file: install/index.php. In short terms, this means that the file launches the XOOPS Installation Wizard. And so the fun begins.
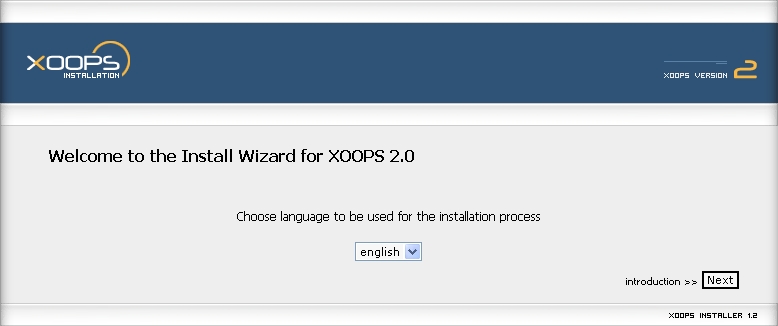
The wizard opens in your browser a page with the following content:
As you can see, the idea is to have installers for different versions, but for the moment there's just the English file. Of course we'll begin recollecting other languages version, so, if for some reason you need to install in a different language, within the install folder there's another folder called language. Inside there's still another folder called English, with some files inside. Copy the folder and rename the copy to another language's name, for instance, Spanish. Then translate the files inside and send us your translated files to include in a future repository for different installation languages. Ok?
All this needs to be done before the installation, so when the wizard reads the files, it can be aware there's more than one language to use during the actual installation.
But let's not spend more time on this. Since you're ready to install your software, you have to click on the button labeled . Another screen will appear, with some introductory content. There you can read what XOOPS is, the terms of its license, its environment requirements and, what's more important, the things you need to have ready before the actual installation begins. Many first-time users don't even bother reading this five short points, and thus march into installation hell just for not reading this stuff. See the screen:
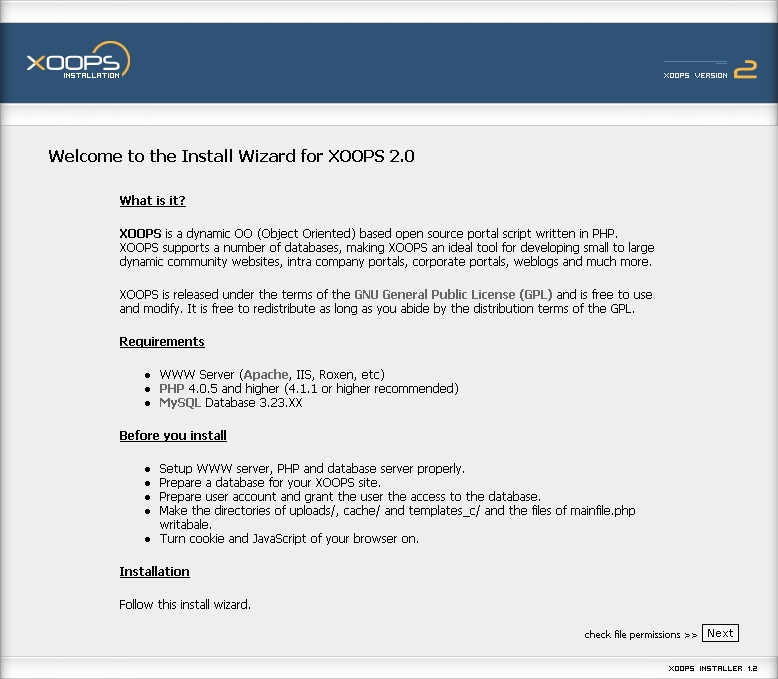
Figure 2.2. This explanatory page includes crucial information about things that need to be there for the install to work
Let's review each of these five bullets, one at a time.
“Setup WWW server, PHP and database server properly.” This means you need to be sure your Web server is active, it can process PHP files and there's a MySQL server running. Also means you know the details to connect to the database server. In other words, you'll need a user name and a password.
“Prepare a database for your XOOPS site.” This is a bit misleading. If you're installing locally, you don't need to prepare the database, and the wizard will create it for you, as we'll see a bit ahead. However, if you're installing in a remote server, you'll certainly need to create the database before installing XOOPS. This is because most host providers won't let you create databases easily; you have to use their tools (usually, a control panel) to do that. So in this case you'll need the database created, and you'll need to know the user and password necessary to communicate with that database.
“Prepare user account and grant the user the access to the database.”. This is already taken care of in the past steps, if you know the details about how to edit the database contents, or if you have root access in the case of a local installation, you're ready to proceed.
“Make the directories of uploads/, cache/ and templates_c/ and the files of mainfile.php writable.”. This is overlooked many times. What this means is these three directories and this file should be editable, you need to have writing privileges over them. In the next part of this guide we'll go over each option carefully.
“Turn cookie and Javascript of your browser on.”. Many of XOOPS options require the use of cookies. If you have them off, your XOOPS site will mysteriously fail. The same is true about Javascript; you need it to run many XOOPS core functions. Then again, if you don't have Javascript activated, you'll probably have a poor Internet experience, as many sites do need Javascript to work correctly.
So, to sum things up, you need all these things solved before attempting the installation. When you're ready, it's time to click on the button labelled . This will take you to the next screen, and we also need to go to the next chapter in this guide. Let's go to Chapter 3, Folder permissions
| | |
| Chapter 1. Preamble | Home | Chapter 3. Folder permissions |